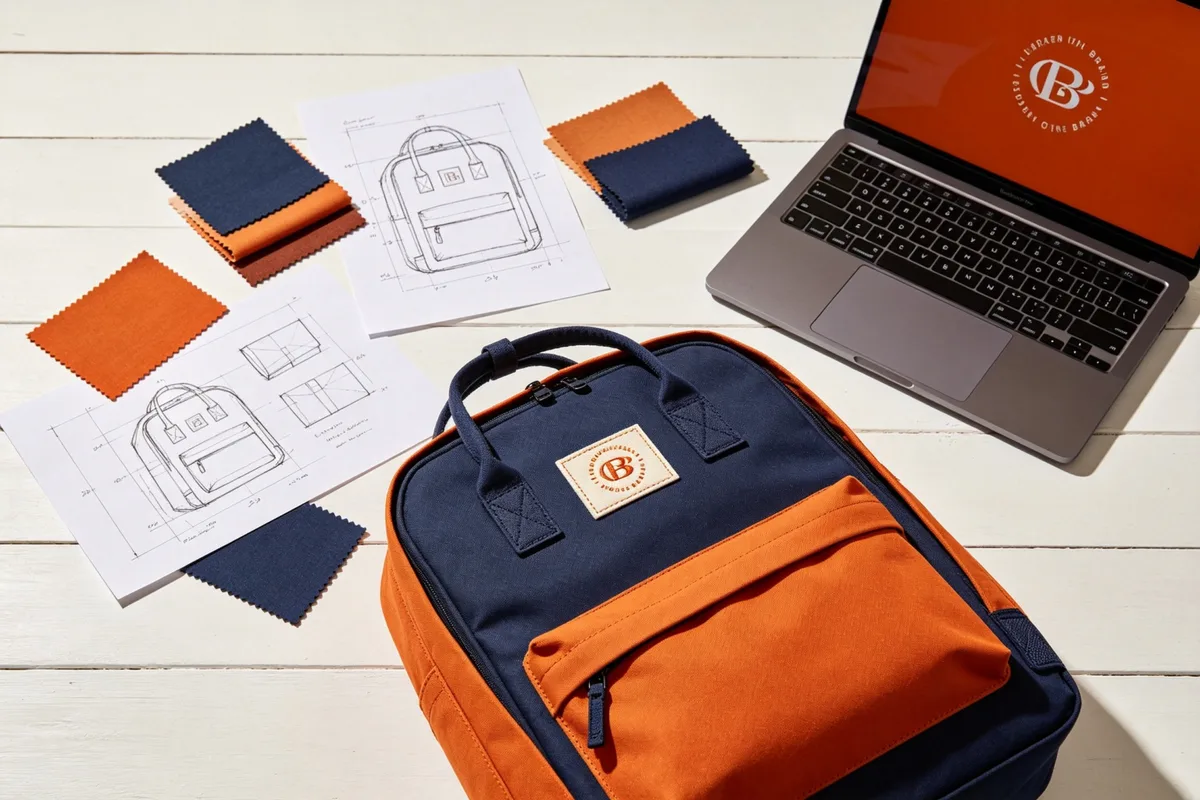
Starting a bag brand takes 9 structured steps: define your niche and target customer, build your brand identity, design your first hero product, create a detailed specification sheet, find a specialized manufacturer, order and evaluate physical samples, place your first production order (typically 500 pieces minimum), conduct third-party quality inspection before shipment, and launch through your chosen sales channels. The entire process from first concept to delivered inventory takes 3-5 months, with a minimum startup budget of $3,000-$8,000 for a 500-piece first order. This guide walks through every phase with factory-level detail, including the exact costs, timelines, and mistakes that sink 60% of first-time bag brands.
This guide is the brand startup playbook in our four-part custom bag series. It covers positioning, product development, budgeting and launch. When you reach the production stages, the other three guides take over:
- How to Get Custom Bags Made — the production journey from your first spec sheet
- How to Source Custom Bags from China — supplier channels, negotiation and shipping
- How to Choose a Bag Manufacturer — scoring and vetting the factory you shortlist
Is Starting a Bag Brand Profitable in 2026?
The global bag and luggage market is projected to exceed $180 billion by 2027, growing at a compound annual rate of 6.8%. Within this market, direct-to-consumer (DTC) bag brands have some of the strongest gross margins in retail — typically 55-70% at retail price. A bag that costs $4.50 to manufacture in China can retail for $35-$60, even after accounting for shipping, packaging, and platform fees. The key to profitability is not selling bags at the lowest price; it is building a brand that commands a premium through design, identity, and customer loyalty.
From our factory floor in Dongguan, we have seen firsthand what separates successful bag brands from the ones that disappear after one production run. The winners share three traits: they start with a single hero product rather than a 12-SKU collection, they invest in physical samples before committing to bulk, and they treat their manufacturer as a partner rather than a transactional supplier. This guide is built on those observations, plus 13 years of producing custom bags for over 200 brands worldwide.
Phase 1: Brand Strategy & Positioning
PHASE 1 · WEEKS 1-4Define Your Niche and Target Customer
The single biggest mistake new bag brands make is trying to sell to everyone. A backpack for "people who like backpacks" will never compete with established brands. A backpack designed specifically for "digital nomads who carry a 16-inch laptop, a camera, and need TSA-friendly access" has a clear market, a clear message, and a clear reason to exist. Your niche should be specific enough that you can describe your ideal customer in one sentence, but large enough to support 500+ unit sales.
To validate your niche, answer these three questions before spending any money: (1) Can you name 3-5 existing brands selling similar products at a price point you can match? Competition validates demand. (2) Are there active communities (Reddit subreddits, Facebook groups, Instagram hashtags) where your target customer congregates? If yes, you have a free marketing channel. (3) Can you identify a specific frustration or unmet need in existing products that your design can solve? This becomes your unique value proposition. Examples we have seen work: minimalist cosmetic bags for travelers who hate bulky cases, insulated cooler bags for parents who need all-day cold retention, and compact waist bags for festival-goers who need phone + wallet + keys without a backpack.
Build Your Brand Identity
Your brand identity is more than a logo — it is the entire visual and verbal system that customers recognize. Start with your brand name: it should be easy to spell, pronounce, and remember, and the .com domain and social media handles should be available. Avoid generic names like "Premium Bags Co." and descriptive names that limit future expansion (naming your brand "Hiking Packs Ltd." makes it hard to later sell tote bags). Check trademark availability in your target market before committing.
Next, develop your visual identity: logo (primary and secondary marks), color palette (2-3 primary colors + neutrals), typography (1-2 font families), and packaging design. Packaging is not an afterthought — it is the first physical touchpoint your customer has with your brand, and unboxing videos drive significant social media traffic for bag brands. Budget $300-$800 for a freelance designer on platforms like Upwork or Fiverr for a basic brand kit, or $2,000-$5,000 for a professional branding agency. Define your pricing position early: budget ($15-$30 retail), mid-range ($30-$80), or premium ($80+). Your manufacturing cost, material choices, and packaging should all align with this position.
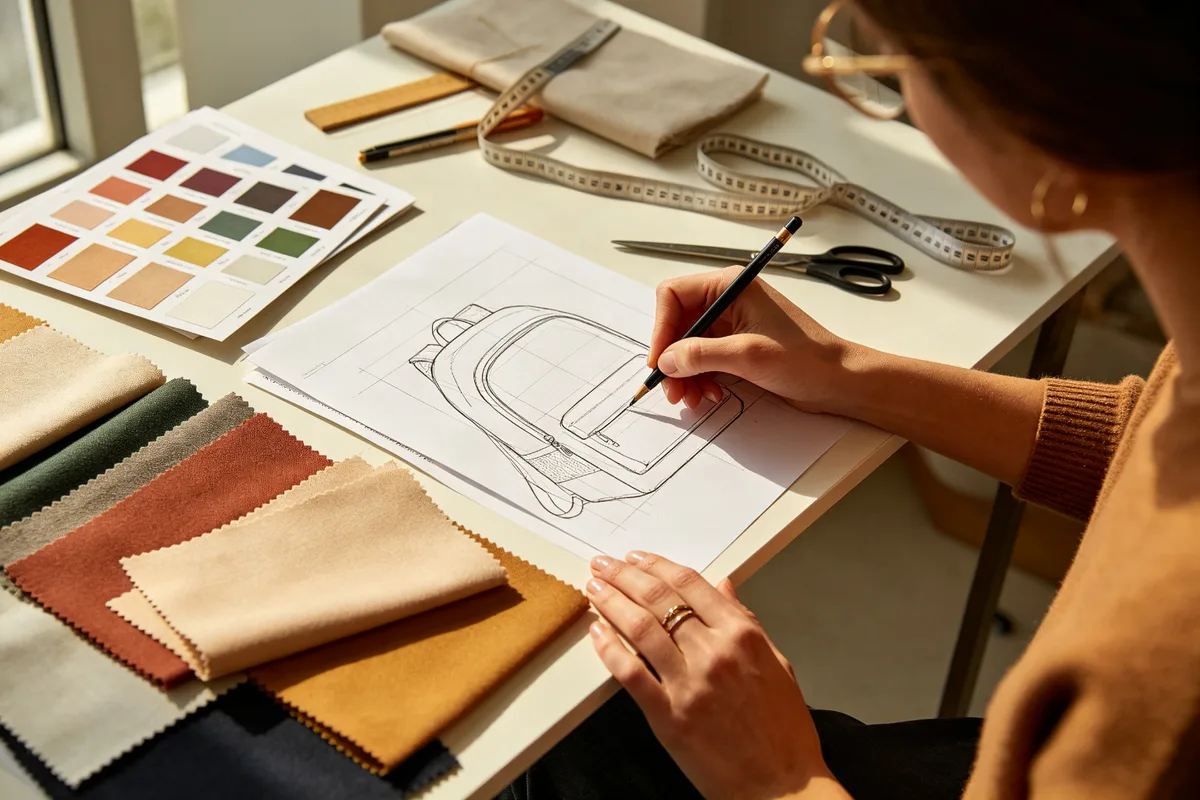
Phase 2: Product design begins with technical sketches, material selection, and a detailed specification sheet.
Phase 2: Product Design & Development
PHASE 2 · WEEKS 3-8Design Your First Hero Product
Resist the urge to launch with a full collection. Your first production run should consist of one hero product in 1-2 colorways. This focus does three things: it reduces your financial risk (500 pieces of one design vs. 500 pieces spread across 5 designs = 100 each, which most factories will not produce), it lets you concentrate your marketing budget on one message, and it gives you real customer feedback before you invest in expanding the line. Many of the most successful DTC bag brands we work with launched with a single product — the classic example is a brand that started with one backpack design and now sells 40+ SKUs.
You do not need to be a professional designer to create your first product. Start with hand-drawn sketches showing front, side, and back views, plus detail sketches of pockets, zippers, and features. Annotate dimensions directly on the sketches. If you want more polished designs, use Adobe Illustrator (industry standard), Procreate on an iPad (great for sketching), or free tools like Canva or Inkscape. Your design files do not need to be factory-ready technical drawings — experienced factories can work from clear sketches plus a written specification sheet. What matters is that your design communicates the product clearly: dimensions, features, pocket layout, strap placement, and any unique functional elements.
Create a Detailed Specification Sheet
The spec sheet is the most important document in the entire manufacturing process — it is the single reference that the pattern maker, material purchaser, cutting team, sewing line, and QC inspector all work from. A vague spec sheet causes misinterpretation, sample delays, and production defects; a detailed one cuts sample revision rounds from 3-4 down to 1-2 and keeps bulk production aligned with your approved sample.
A solid spec document answers the questions your factory will ask anyway. Work through these, even if you write "TBD" next to some: the finished size in cm and inches, the outer fabric and its weight (600D polyester, 210D nylon, or 12oz canvas), the lining, the zipper brand and tooth size (YKK #5/#8 or generic), zipper pull style and color, the buckles and metal fittings (POM plastic, zinc alloy, color finish), the strap and its width, how the logo is applied (silkscreen, heat transfer, embroidery, woven label, debossed), where the logo sits and how large, your target MOQ, the unit price you want to land near, and any functional extras (water resistance, insulation, RFID blocking, USB port). Attach your design files (AI, PDF, sketches) and any reference photos of similar products you like. If you are unsure about materials, it is perfectly acceptable to write "factory recommendation for [function] at [price point]" — a good factory will propose 2-3 options. For a deeper dive into material choices, see our materials guide.
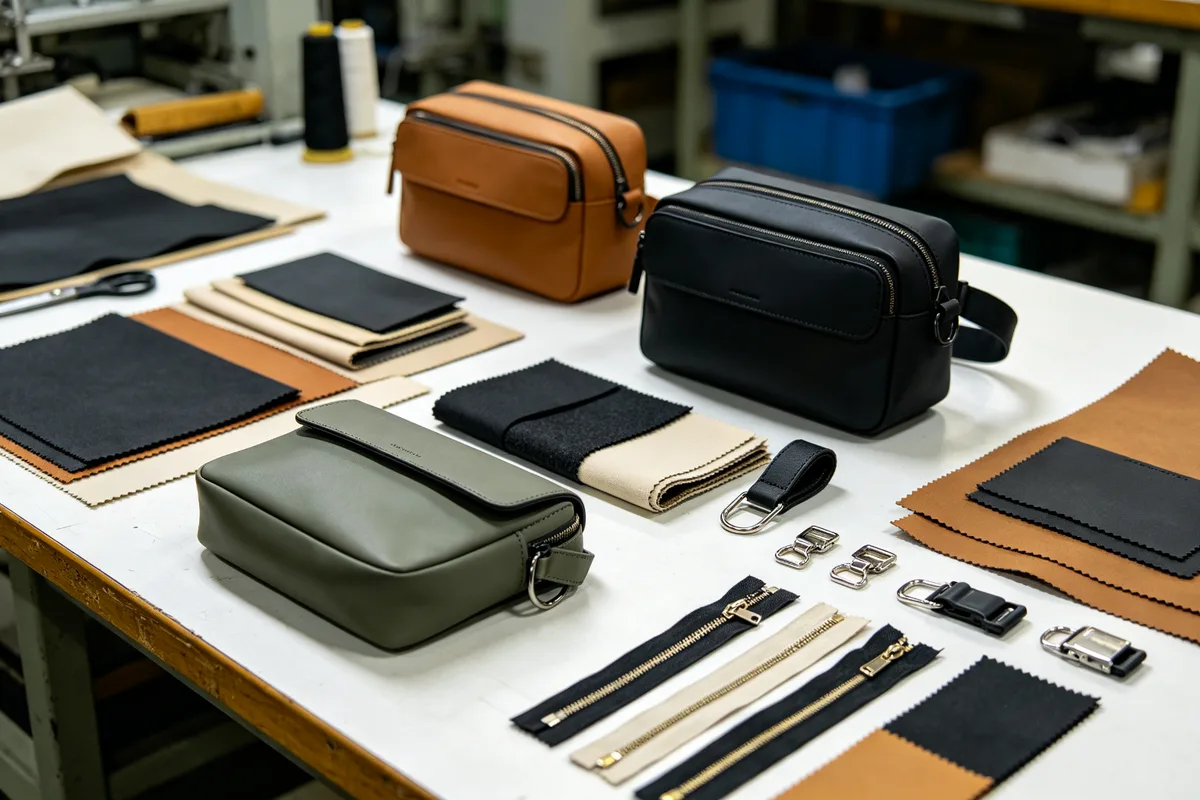
Phase 3: Physical samples reveal material quality, stitching, and construction details that photos cannot capture.
Phase 3: Sourcing & Sampling
PHASE 3 · WEEKS 5-12Find the Right Manufacturer
Founders typically connect with bag manufacturers one of three ways: B2B marketplaces (Alibaba.com, Global Sources, Made-in-China.com), trade exhibitions (Canton Fair, Hong Kong APLE, China International Leather Fair), or word of mouth from people in the industry. When you compare suppliers, weigh platform badges ("Gold Supplier" or "Verified Supplier"), how many years they have been in business (five or more is a good sign), and whether bags dominate their catalogue — at least 70% of listed items. A factory that lists bags, electronics, clothing, and home goods all in one storefront is almost certainly a trading company, not a factory. Trading companies add 15-30% markup and cannot control production quality or lead time directly.
Run a quick vetting pass before ordering samples: check the business license against government databases, ask for pictures of the entrance, production floor, and QC station, collect their certification list (BSCI, ISO9001, Sedex, GRS), get two or three client references in your market, and confirm their core categories line up with yours — a cosmetic bag specialist may not have the equipment for technical backpacks with load-bearing structures. For a complete step-by-step sourcing process, read our guide on how to source custom bags from China. If you are deciding between manufacturing models, our OEM vs ODM comparison explains which model fits your brand stage.
Sample Before You Commit
Never place a bulk order without evaluating a physical sample. Treat the sample as a decision tool, not a formality. Before you commit thousands of dollars to a production run, a sample tells you whether the fabric, stitching, hardware, and print actually deliver what your spec promised. Expect to pay somewhere in the low hundreds for it, and most factories return that money if you follow through with a 500+ piece order. Give yourself a week or two for sampling plus revisions, and always request courier delivery so you can hold the physical piece before deciding.
When evaluating samples, check every detail systematically: material weight and texture (compare against your spec sheet — if you specified 600D polyester and the sample feels thin, ask for the actual denier), stitching quality (even stitch density of 8-10 stitches per inch, no loose threads, reinforced stress points at strap attachments and pocket corners), zipper smoothness (test opening and closing 10+ times — a quality zipper should glide without catching), hardware durability (buckles should click securely, D-rings should not bend under hand pressure), printing or embroidery quality (color accuracy against your Pantone reference, registration alignment, durability — rub firmly with a damp cloth 20 times to test for fading), dimensions (measure with a tape measure — tolerance of ±1cm is acceptable), and overall construction (lining attachment should be clean, pocket placement should match your design, strap reinforcement should be bar-tacked or box-stitched). Order from 2-3 shortlisted factories and review the samples against your brand checklist — how the pouch opens, how the logo sits, how the interior looks when packed - a sample that photographs well can still disappoint in the hand. Expect 1-2 revision rounds before finalizing your sample. If a factory becomes defensive or refuses to make corrections after you point out clear defects, this is a warning sign about how they will handle quality issues during bulk production.
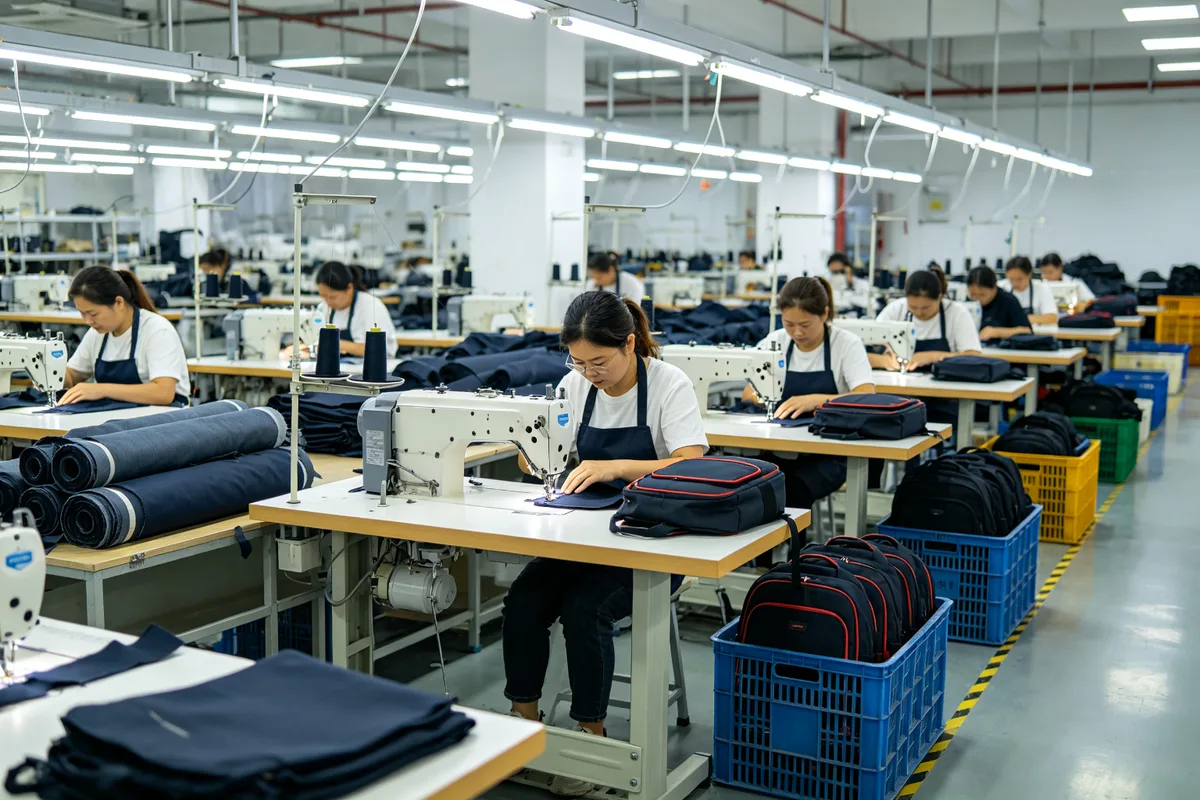
Phase 4: Mass production runs 20-35 days after pre-production sample approval and deposit payment.
Phase 4: Production & Launch
PHASE 4 · WEEKS 10-20Place Your First Production Order
Once you have approved a final sample, it is time to place your first production order. The standard MOQ for custom bags in China is 500 pieces per design/color. If your target quantity is below this, read our MOQ strategy guide for five practical ways to reduce first-order inventory risk. Negotiate unit price based on your order quantity — the price per unit drops significantly at 1,000 pieces vs. 500 pieces, and again at 3,000 pieces. Standard payment terms are 30% deposit upon order confirmation, 70% balance before shipment (after inspection passes). Never pay 100% upfront — this eliminates your leverage for quality issues. Plan your first-order cash flow around the standard sequence - a deposit (often 30%) followed by the balance against the packing list - and keep PayPal or Trade Assurance for small early orders where buyer protection matters more than rate.
Before production begins, have the factory make a pre-production sample (PPS) from the exact materials, hardware, and construction that will be used in the bulk order. Unlike your initial development sample — which may use substitute materials — the PPS comes off the production line and becomes your contractual quality benchmark. Approve it in writing with photos, and keep the physical sample for comparison during final inspection. Any change requested after PPS approval can add cost and delay production, so verify every detail before signing off. Sign a written purchase contract that includes: unit price, total quantity, color breakdown, material specifications, packaging requirements, production lead time (counted from deposit receipt and PPS approval), inspection terms, shipping terms (FOB, CIF, DDP), and penalty clauses for delays or quality failures. For a transparent view of where your money goes, see our custom bag cost breakdown.
Quality Inspection and Shipping
During production, ask the factory for periodic photo updates — at minimum, shots of material cutting, mid-production assembly, and finished goods before packaging. This surfaces problems early, while they can still be fixed cheaply. When production is around 80-100% complete and the goods are packed, schedule a final random inspection (FRI). Under the AQL system, you are looking at 2.5 for major faults and 4.0 for minor faults, and the inspector pulls more units as the order grows — 80 bags in a 501-1,200 run. Self-inspection on site works, as does hiring an outside firm like SGS, Bureau Veritas, Intertek, or QIMA. Third-party checks typically cost $180-$350 per inspector-day, and most bag audits wrap up within a day. Think of that ~$250 fee as cheap insurance: it flags defects before the goods ship, while fixes are still inexpensive.
Do not pay the balance or authorize shipment until inspection passes. Once the goods leave the factory, your leverage over quality drops sharply. After inspection passes and the balance is paid, the factory will deliver goods to your chosen shipping forwarder or port. Your goods can move three ways. Ocean freight (LCL shares a container, FCL books a full 20ft or 40ft box) is the cheapest per unit for big runs and takes 15-35 days depending on the destination. Air freight is far quicker at 5-10 days but carries a heavy premium, which is why it is reserved for urgent or compact, high-value consignments. Express couriers (DHL, FedEx, UPS) deliver in 3-7 days door-to-door yet cost the most per kilo, so they are really only worth it for samples or shipments below about 100kg. For most custom bag orders of 500+ pieces, sea freight LCL or FCL is the standard choice. Use a freight forwarder who knows the China-to-your-country route and can manage booking, documentation, customs declaration, and clearance. Have your freight forwarder confirm the HS code (textile or leather bags usually sit under 4202) and match the commercial invoice to the packing list - a mismatch is the most common cause of customs holds on first shipments.
Launch and Sell
Once your inventory arrives, the real work begins. Start with professional product photography — this is non-negotiable for online sales. Budget $200-$500 for a freelance product photographer, or invest in a basic lighting setup ($100-$200) and shoot it yourself if you have the skills. Your product photos should include: clean white-background shots (required for Amazon and most marketplaces), lifestyle shots showing the bag in use (being worn, packed, in context), and detail shots of features (zippers, pockets, materials, logo). Write product descriptions that focus on benefits and use cases, not just specifications — "fits a 16-inch laptop and has a hidden anti-theft pocket for your passport" is more compelling than "dimensions: 45×30×15cm, polyester material."
Choose your sales channels based on your target customer. The most common channels for new bag brands are: your own e-commerce website (Shopify, WooCommerce, BigCommerce) — highest margin, full brand control, but requires driving your own traffic; Amazon FBA — massive built-in audience, but intense price competition and high fees (15% referral fee + FBA fees); Etsy — good for handmade or niche designs, but limited scale potential; and wholesale accounts with boutique retailers or corporate gifting companies — larger order sizes, but lower margins per unit. Most successful new brands start with 1-2 channels and expand once they have proven demand. Plan a launch strategy: build an email list during production and offer early-bird pricing, collaborate with micro-influencers (10K-100K followers) in your niche who will genuinely use your product, run targeted social media ads (Instagram/Facebook for visual products like bags), or consider a Kickstarter or Indiegogo campaign if your product has a strong innovation angle. Start with your hero product, gather customer feedback through reviews and direct communication, and use that data to design your second product. The brands that last are the ones that iterate based on real customer behavior, not the ones that launch with a 20-SKU collection based on guesswork.
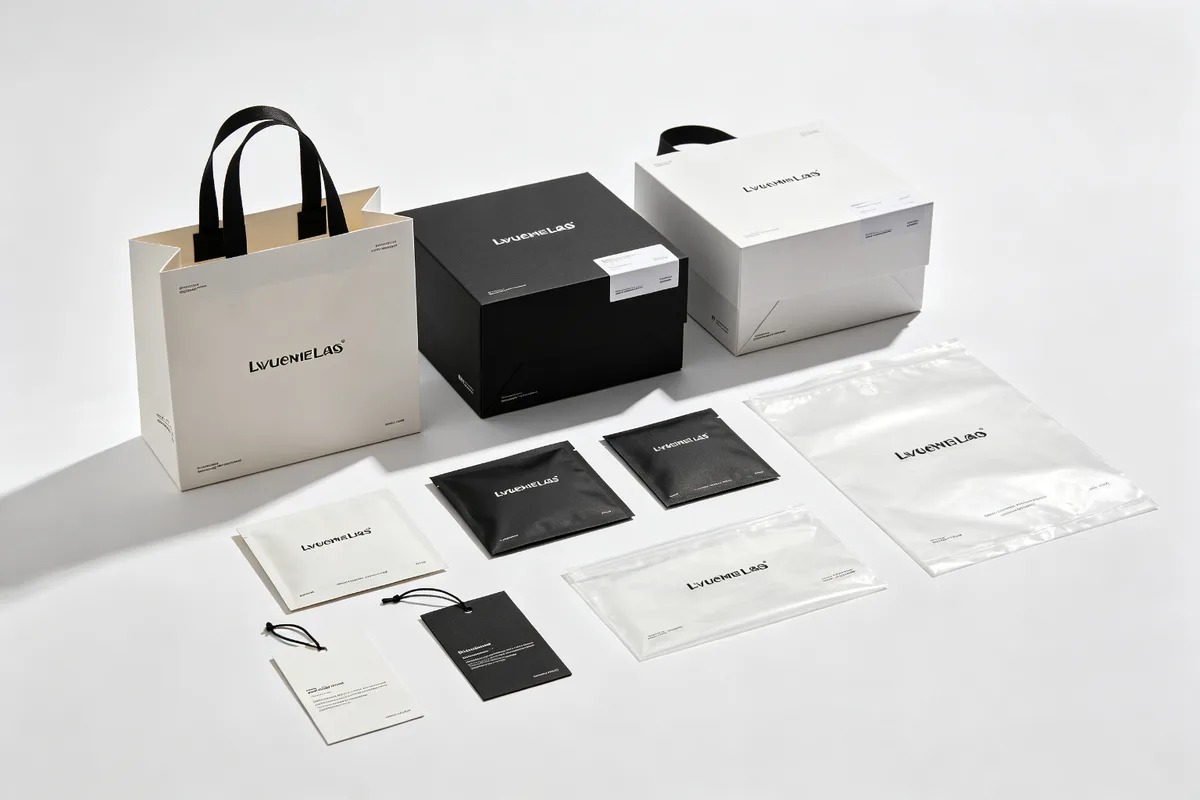
Phase 4 complete: Retail-ready products with branded packaging are the final deliverable before launch.
Startup Budget Breakdown
The budget ranges below assume a 500-piece first production run. The Lean line is the floor — stock materials, simple packaging, and do-it-yourself where you can. Standard reflects what most first-time founders actually end up spending, and Premium assumes upgraded materials, custom packaging, and hired professionals.
| Cost Category | Lean | Standard | Premium | Notes |
|---|---|---|---|---|
| Sample fees (2-3 factories) | $150 | $300 | $600 | Often refundable on bulk order |
| Production (500pcs at $3-$10/unit) | $1,500 | $3,000 | $5,000 | 30% deposit upfront, balance before shipment |
| Branding & packaging | $200 | $500 | $1,500 | Custom hang tags, polybags, boxes |
| Product photography | $100 (DIY) | $300 | $800 | White background + lifestyle shots |
| Website setup | $200 | $400 | $1,000 | Shopify theme, domain, apps |
| Quality inspection | $0 (self-inspect) | $250 | $350 | Third-party AQL 2.5 inspection |
| Shipping (sea freight LCL) | $400 | $700 | $1,200 | Depends on volume and destination |
| Customs & duties | $200 | $400 | $700 | Varies by country and product value |
| Initial marketing budget | $250 | $1,000 | $3,000 | Social ads, influencer, email list |
| Total | $3,000 | $6,850 | $14,150 | Excludes ongoing operating costs |
Full Timeline: From Concept to Shelf
| Phase | Duration | Key Deliverables | Cumulative Time |
|---|---|---|---|
| Phase 1: Brand Strategy | 2-4 weeks | Niche defined, brand identity, business registered | Week 4 |
| Phase 2: Product Design | 2-4 weeks | Design sketches, spec sheet, reference images | Week 8 |
| Phase 3: Sourcing | 1-2 weeks | Factory shortlist (3-5), quotations received | Week 10 |
| Phase 3: Sampling | 3-6 weeks | Physical samples, 1-2 revision rounds, final sample approved | Week 16 |
| Phase 4: Production | 3-5 weeks | PPS approved, deposit paid, mass production complete | Week 21 |
| Phase 4: QC & Shipping | 3-5 weeks | Inspection passed, goods shipped, inventory received | Week 26 |
| Launch Preparation | 1-2 weeks (overlaps with shipping) | Product photos, website live, marketing ready | Week 26 |
| Total | 15-26 weeks | Product available for sale | 3.5-6.5 months |
6 Mistakes That Sink First-Time Bag Brands
| Mistake | Consequence | How to Avoid |
|---|---|---|
| Spreading the first order across 5+ designs | Thin capital: 500 pieces split into 100 per design (below MOQ), dead inventory, cash-flow strain | Open with one hero product in 1-2 colorways and prove demand before expanding the line. |
| Going with the rock-bottom quote and skipping supplier checks | Substandard goods, missed deadlines, or a supplier who vanishes after the deposit — with no recourse | Screen suppliers before money moves: confirm the business license, review factory photos and certifications, and order samples from 2-3 candidates. |
| Buying a full run without ever touching a sample | Material or build defects arrive that a sample would have caught, forcing costly rework or unsellable stock | Order and handle samples first; test zippers, stitching, materials, and dimensions before you commit to bulk. |
| Shipping without an independent QC pass | Flawed goods arrive, and defects surface only after delivery, when returns are impractical | Use an independent inspector (SGS, Intertek, QIMA) for an AQL 2.5 random check pre-shipment, and keep the balance unpaid until it passes. |
| Handing the factory a thin spec document | Repeated sample rounds, production delays, and a finished product that misses your brief — with the factory blaming unclear instructions | Draft a full spec sheet — dimensions, materials, hardware, printing method, functional needs — before you approach any supplier. |
| Undershooting the true landed cost | Real cost lands 30-50% above estimate, squeezing margins and risking loss-making sales | Build production, freight, insurance, duties, domestic delivery, inspection, and packaging into the total before you set retail prices. |
Brand Assets That Lift Perceived Value
Your packaging is part of the product. A tissue-paper insert, a branded dust bag, and a thank-you card that matches your logo colors cost pennies per unit but change how customers photograph and review your product. Match your retail packaging to the bag's materials — a canvas tote pairs naturally with kraft paper and cotton twine, while a vegan-leather bag reads better in a rigid black box. Plan your product photography around one consistent background style so your store and social feed look cohesive. These details matter disproportionately in the early months, when a single unboxing video can outperform a month of paid ads.
Go-To-Market: A Launch Checklist Before Your First Batch Ships
Price your product before you order, not after. A common rule of thumb for DTC bags is to set retail price at roughly 4-6x landed cost (manufacturing, shipping, duties, and platform fees combined). If your landed cost is $12 per unit, a $55-$75 retail price leaves room for ads, discounts, and marketplace fees while preserving a healthy margin. Positioning your price too close to cost leaves no budget for customer acquisition, which is the real engine of a new brand.
Set up your selling infrastructure during the production window, not after it. Register your store (Shopify, WooCommerce, or Amazon), draft product listings with accurate dimensions, materials, and care instructions, and book photography with both white-background and lifestyle shots. These assets take weeks to finalize, so doing them while the factory runs your order means you can launch the moment inventory lands.
Use the production window to build demand instead of waiting for stock. Grow an email list with a pre-launch offer, tease the product on Instagram or TikTok with behind-the-scenes content, and line up 5-10 micro-influencers (10K-100K followers) who genuinely fit your niche. A soft launch to your list before a full public launch lets you gather real feedback and fix issues while your first batch is still fresh.
Have a post-launch review date on the calendar. Thirty days after launch, look at which channel drove sales, which product feedback repeated, and what your return rate was. That data tells you whether to reorder the hero product, adjust pricing, or design a second colorway — most successful brands iterate from real customer behavior rather than from guesswork.
Conclusion
Starting a bag brand is more about discipline than complexity. Nine phases — niche definition, brand identity, hero product design, a complete spec sheet, manufacturer selection, physical sampling, the first production run, inspection and shipping, then launch — carry you from concept to revenue. The most critical success factors are: starting with one product rather than a collection, investing in physical samples before committing to bulk, creating a detailed specification sheet, and never skipping third-party quality inspection. Brands that cut corners on these steps to save time or money almost always encounter more costly problems later. With a 500-piece MOQ, a $3,000-$8,000 minimum budget, and a 3-5 month timeline, starting a bag brand is accessible to anyone willing to invest the effort in proper planning and execution.
Ready to Turn Your Bag Brand Concept Into a Physical Product?
Based in Dongguan with 13 years of bag production, BSCI & ISO9001 accreditation, a 500-unit MOQ, and OEM/ODM services, we respond to every spec with a factory-direct price within 8 Hours — and first-time founders get a free sample consultation.
Start Your Bag Brand TodayFrequently Asked Questions
What budget should I set aside to start a bag brand?
Direct Answer: Plan a minimum budget of $3,000-$8,000 for a 500-piece first order, covering samples, the 30% production deposit, branding, photography, website setup, and shipping. Premium materials or larger runs push the total to $10,000-$25,000.
- First-Order Budget: $3,000-$8,000
- Sample Fees: $150-$400
- Production Deposit (30%): $1,500-$4,000
- Branding & Packaging: $300-$800
- Premium / Larger Run: $10,000-$25,000
The minimum startup budget for a bag brand is $3,000-$8,000 for a 500-piece first order. This includes sample fees ($150-$400), production deposit ($1,500-$4,000 at 30%), branding and packaging ($300-$800), product photography ($200-$500), website setup ($200-$500), and shipping/inspection ($500-$1,500). Premium materials, custom hardware, and larger orders increase costs to $10,000-$25,000.
How many pieces do I need to order at minimum?
Direct Answer: Work around 500 units per design and color as the practical minimum. Simple bags in stock materials can dip near 300, while custom-dyed fabric or special hardware pushes toward 1,000+. Folding several colors into one order is the easiest way to clear the threshold.
- Working MOQ: ~500 pcs per design/color
- Stock-Material Trial: ~300 pcs
- Complex Builds: ~1,000 pcs
- Color Pooling: 200+200+200 = 600 pcs
Plan around 500 units per design and color as the working minimum for most Chinese bag factories. Orders can dip to about 300 for simple bags built from stock materials, while intricate designs with custom-dyed fabric or special hardware often push toward 1,000 or more. One practical trick: fold several colors into a single order — for instance 200 black, 200 navy, and 200 gray together clear 600 units — or lean on materials the factory already stocks.
How long does it take to start a bag brand from scratch?
Direct Answer: Expect 3-5 months from concept to delivered inventory: strategy and design 2-4 weeks, sourcing and sampling 4-8 weeks, production 20-35 days, and sea shipping 15-35 days. First-time founders should budget 5 months to absorb revisions and delays.
- Strategy & Design: 2-4 weeks
- Sourcing & Sampling: 4-8 weeks
- Production: 20-35 days
- Sea Shipping: 15-35 days
- Total: 3-5 months
The full timeline from concept to delivered inventory is 3-5 months. Phase 1 (brand strategy and design) takes 2-4 weeks. Phase 2 (sourcing and sampling) takes 4-8 weeks including 1-2 sample revision rounds. Phase 3 (production) takes 20-35 days. Phase 4 (shipping and delivery) takes 15-35 days by sea. First-time founders should budget 5 months to account for unexpected delays in sample approval or production.
Do I need a business license to start a bag brand?
Direct Answer: You do not need a business license to design products or contact factories, but you will need a registered entity to open a business bank account, accept payments, file taxes, and sell on marketplaces like Amazon. Register an LLC or equivalent and trademark your brand name.
- To Design / Contact Factories: No license needed
- To Sell / Accept Payments: Registered business entity
- Marketplace Requirement: Amazon business registration
- Recommended: Trademark the brand name
You do not need a business license to design products or contact manufacturers. However, you will need a registered business entity to open a business bank account, accept payments, file taxes, and sell through most online marketplaces (Amazon requires business registration for seller accounts). Register your business as an LLC, sole proprietorship, or equivalent in your country. You should also trademark your brand name to prevent copycats.
Can I start a bag brand with no prior manufacturing experience?
Direct Answer: Yes — most successful bag-brand founders had no manufacturing background. The key is a detailed spec sheet, physical samples from multiple factories, and never skipping third-party inspection. Start with one hero product at 500 pieces to learn the process with minimal risk.
- Entry Point: One hero product
- First Run: 500 pieces
- Must-Have: Detailed spec sheet
- Never Skip: Third-party QC
Yes. Most successful bag brand founders had no manufacturing experience when they started. The key is to create a detailed specification sheet, order physical samples from multiple factories, and never skip third-party quality inspection. Choose a manufacturer that communicates well and asks clarifying questions — this indicates they care about getting your product right. Start with a single hero product at 500 pieces to minimize risk while you learn the process.